Mint Chocolate Cheesecake: A Delightful Dessert for Every Occasion

Mint chocolate cheesecake is that perfect blend of creamy, cool, and chocolatey that just makes your tastebuds do a little happy dance. You know, there’s something about that minty freshness with chocolate that feels—well, almost like a celebration, even if it’s just a random Tuesday night. I mean, who says you need a big event to treat yourself, right?
Honestly, I’ve made this for birthdays, potlucks, or just when I’m craving something sweet after dinner. The green color always makes people smile, kind of reminds me of springtime, even in the middle of winter. And, um, if you’re a fan of Andes Mints, you’re in for a treat. This one’s all about dessert and, I guess, sharing a little joy around the table with friends or family.
Personal Anecdote
So, the first time I made this mint chocolate cheesecake, I was honestly just trying to use up some leftover Andes Mints from a holiday stash. Didn’t expect it’d become my go-to dessert for parties, but here we are! My little cousin calls them “green cupcakes,” and, well actually, the nickname kind of stuck. Every time I pull out a batch, it’s almost like a mini celebration—people just gather round, waiting for that first bite.
Why This Recipe is Special
It’s not just about the flavor (though wow, that combo is hard to beat). There’s something about making a dessert that looks a bit fancy but honestly isn’t tough at all. Plus, you can whip these up ahead of time, pop ‘em in the fridge, and have a stunning treat ready for dessert after dinner. That’s a lifesaver, you know? Especially when you want to relax with your guests instead of fussing in the kitchen. Dessert should feel easy, and this one totally does.
Ingredients breakdown
| Ingredient | Quantity |
|---|---|
| Oreo cookie crumbs | 1 1/4 cups |
| Granulated sugar | 1 tbsp + 1/3 cup |
| Salted butter, melted | 4 tbsp |
| Cream cheese, room temp | 16 oz |
| Large egg | 1 |
| Mint extract | 1/2 tsp |
| Green food coloring | 3 tsp (or to preference) |
| Semi-sweet chocolate chips | 1 cup |
| Heavy whipping cream | 1/3 cup |
| Andes Mints, chopped | 3/4 cup (about 20 mints) |
| Whole Andes Mints (for garnish) | 12 |
| Whipped cream (optional) | as desired |
Utensils and substitutions
You’ll want a muffin pan, some paper liners, a hand mixer, and, well, a microwave for the ganache. If you’re out of Oreo crumbs, honestly, any chocolate cookie will work—just crush ‘em up. No Andes Mints? Try chocolate chips with a splash more of mint extract. And by the way, for some basic food safety stuff, check out foodsafety.gov—they’ve got tips on storing dairy desserts and all that. Oh, and if you don’t have a mixer, a strong arm and a whisk can get you pretty far, though it takes a bit more elbow grease. Sometimes, the old-school way makes the dessert taste even better. Or maybe that’s just in my head.
Step-by-step method
Step 1
First, let’s get the oven ready by preheating it to 325 degrees F. Next, line a muffin pan with paper liners and give each one a light spray with non-stick spray. In a medium bowl, stir together Oreo cookie crumbs, a tablespoon of sugar, and melted butter. Press about 2 tablespoons of this mixture into the bottom of each muffin liner. You might find a spoon works best, but honestly, I just use my fingers and sometimes make a bit of a mess—that’s half the fun.
Step 2
Now, grab your electric mixer and beat the cream cheese until it’s all smooth and fluffy. Add in the 1/3 cup sugar, mixing until fully blended. Then mix in the egg, mint extract, and green food coloring—go slow here, just until it’s combined. Stir in those chopped Andes Mints at the end, but avoid overmixing. I always seem to get a few bits stuck on the beater, but it’s all good.
Step 3
Divide the cream cheese mixture over your crusts and bake for 20 minutes. Once baked, turn off the oven and crack the door open, letting them cool for 10 minutes right in there. Chill in the fridge for at least 6 hours. For the ganache, heat cream, add chocolate chips, cover and let sit, then stir until smooth. Spoon over each cheesecake and let set. Garnish with whipped cream and an Andes Mint if you like. It’s not always perfect, but they’re always delicious.
Tips and tricks to make this recipe shine
Honestly, room temperature ingredients make everything smoother, so don’t skip that step. If you want a deeper mint color, add a drop more food coloring. And don’t worry if your ganache isn’t perfectly smooth—mine rarely is, but it always tastes amazing!
What to serve with this recipe
Mint chocolate cheesecake pairs so well with a cup of hot coffee or a glass of cold milk. Sometimes, I find a handful of fresh berries on the side adds a nice pop of color and freshness, though my kids just want more cheesecake. If you’re serving these at a party, a little bowl of extra Andes Mints on the table is a fun touch. They’re rich, so a light fruit salad also balances things out.
How to store and reheat
Storing these is a breeze. Simply cover the cheesecakes tightly with plastic wrap or pop them into an airtight container. They’ll keep in the fridge for up to 5 days, though honestly, they rarely last that long at my house! If you’re making them ahead, you can freeze them (without the ganache) for up to a month and add the topping after thawing in the fridge overnight. These little cheesecakes taste best chilled, so no need to reheat—just unwrap and enjoy.
Print
Easy Mint Chocolate Cheesecake Recipe for Dessert Lovers
- Total Time: 6 hours 40 minutes
- Yield: 12 servings
- Diet: Vegetarian
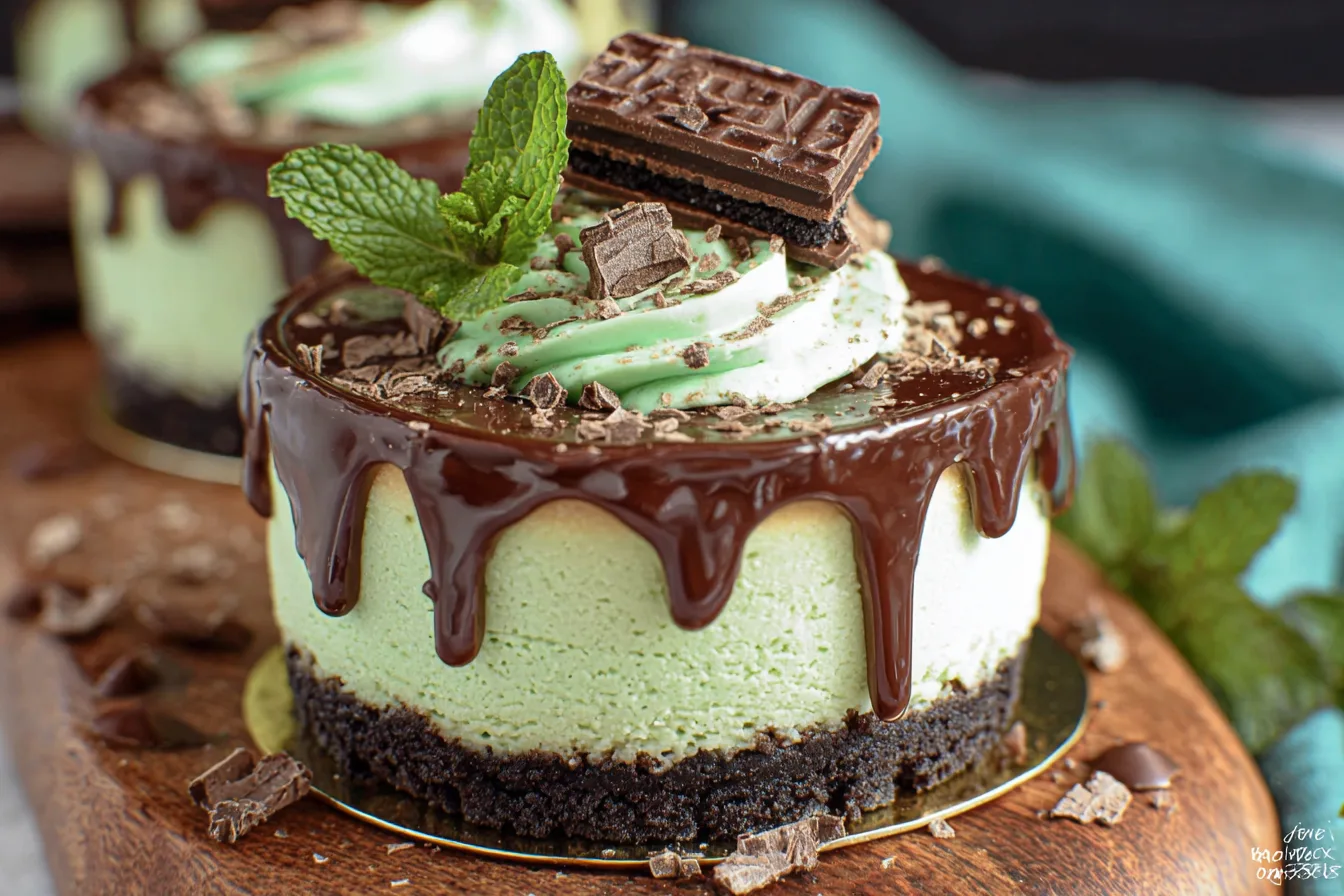
Description
A creamy mint chocolate cheesecake with a cookie crust, topped with rich chocolate ganache and Andes Mints.
Ingredients
1 1/4 cups Oreo cookie crumbs
4 tablespoons salted butter, melted and cooled
16 ounces cream cheese, at room temperature
1/3 cup granulated sugar
1 large egg, at room temperature
1/2 teaspoon mint extract
3 teaspoons green food coloring
1 cup semi-sweet chocolate chips
1/3 cup heavy whipping cream
3/4 cup Andes Mints, chopped
12 whole Andes Mints and whipped cream for garnish
Instructions
Preheat oven to 325 degrees F. Line a 12-cup muffin pan with paper liners and lightly spray.
Combine Oreo crumbs, 1 tablespoon sugar, and melted butter. Divide evenly among liners, pressing down to form crusts.
Beat cream cheese until smooth. Add 1/3 cup sugar and mix until incorporated.
Add egg, mint extract, and green food coloring; mix on low. Stir in chopped Andes Mints gently.
Spoon mixture over crusts. Bake 20 minutes. Turn off oven, leave door open, cool 10 minutes.
Refrigerate cheesecakes at least 6 hours. Remove from pan carefully.
Heat cream in microwave 40 seconds. Add chocolate chips, cover 3-5 minutes, stir smooth.
Spoon ganache over cheesecakes, set 5 minutes.
Garnish with whipped cream, whole Andes Mints, and Oreo crumbs if desired.
Notes
Be careful not to overmix after adding chopped Andes Mints to keep texture.
Refrigeration overnight improves flavor and texture.
Use green food coloring according to preference for color intensity.
- Prep Time: 20 minutes
- Cook Time: 20 minutes
- Category: Dessert
- Method: Baking
- Cuisine: American
Nutrition
- Serving Size: 1 serving
- Calories: 290
- Sugar: 22
- Sodium: 160
- Fat: 21
- Saturated Fat: 12
- Unsaturated Fat: 6
- Carbohydrates: 21
- Fiber: 1
- Protein: 4
- Cholesterol: 55
FAQ
Can I use peppermint extract instead of mint extract?
Yes, you can! Peppermint extract works well, but it’s a bit stronger, so use a little less to avoid overpowering the flavor.
Can I make this mint chocolate cheesecake without food coloring?
Absolutely. The green color is just for fun, so feel free to skip it if you prefer a more natural look.
Do I need to use a water bath?
Nope, these mini cheesecakes bake up perfectly without one, so you can skip the fuss.
Can I substitute the Andes Mints?
You can swap in other mint chocolates if needed, but Andes Mints give the best flavor and texture in my experience.
There’s something so joyful about making and sharing mint chocolate cheesecake—especially when the kitchen smells like chocolate and mint. Even if your cheesecakes crack a little or the ganache drips down the sides, that just makes them more lovable. If you give this recipe a try, I’d love to hear how it goes and what little tweaks you make for your family. For more cozy dessert ideas and kitchen chat, follow us on Pinterest and let’s keep baking together!